

1. Author the agent in a package
Create or fork a local package in Flow Studio. Addmaister-agents/<agent-id>.md from the package file tree and fill the structured
agent form. The file body is the agent’s system instruction. Its frontmatter
declares:
- name, description, workspace mode, session mode, and risk tier;
- supported trigger sources and optional same-package Flow;
- optional runner, MCP requirements, guardrails, configuration fields, private memory recommendation, and project-setting recommendations.
capability/**/agents/ are runtime subagents and
do not enter the platform-agent catalog.
Create a commit and cut after review. Install the cut or upstream release, then
attach and trust that package in the target project.
2. Attach the agent to a project
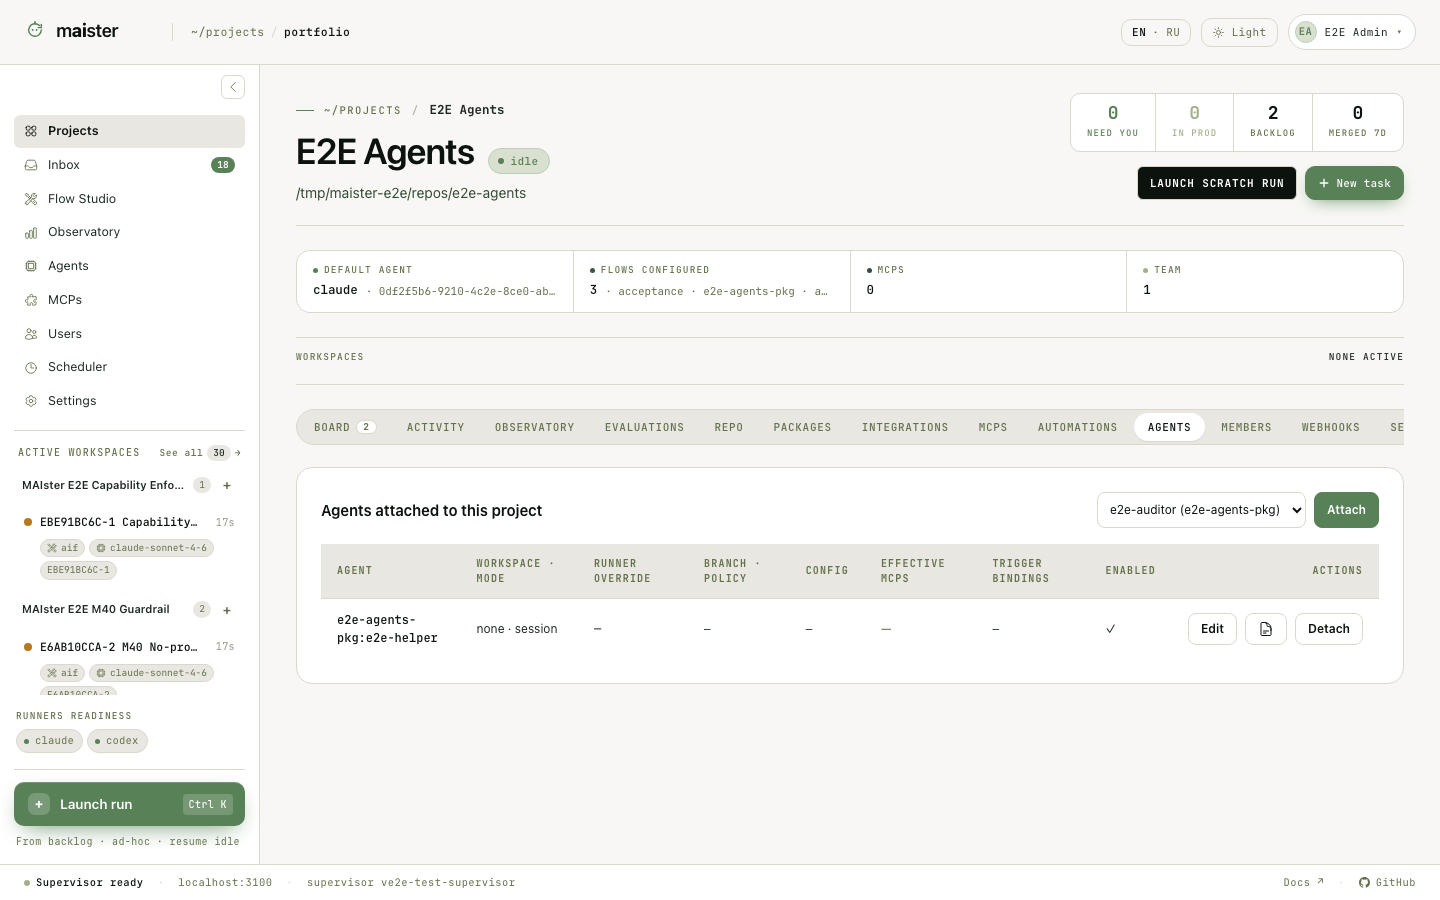 Open Project → Agents. The lower list contains agents supplied by attached,
trusted packages. Choose Attach beside the required agent. MAIster fills the
form from the package’s recommendations; the project admin decides the stored
values.
Set these fields before enabling the attachment:
Open Project → Agents. The lower list contains agents supplied by attached,
trusted packages. Choose Attach beside the required agent. MAIster fills the
form from the package’s recommendations; the project admin decides the stored
values.
Set these fields before enabling the attachment:
The attachment is the grant. Disabling or detaching it stops future triggers
and revokes live agent tokens. A flow-bound agent cannot use private agent
memory because its work runs through Flow sessions.
3. Configure triggers
The same edit dialog owns the effective trigger bindings:
The Project → Automations tab shows timing and the latest safe outcome for
cron and event bindings. Return to Project → Agents to edit them.
4. Test and inspect
Launch the enabled attachment by hand. A standalone agent creates a normal Run withrun_kind=agent. An agent that drives a same-package Flow creates a Flow
Run and injects its persona into the coding nodes.
Open the Run to inspect its session, prompt, tool activity, requests for human
input, token use, cost, and terminal result. MAIster quarantines a writable
agent when the dirty-workspace guard detects changes outside its declared
contract; the project admin must inspect and release it.